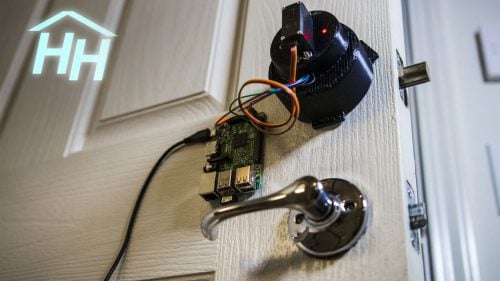
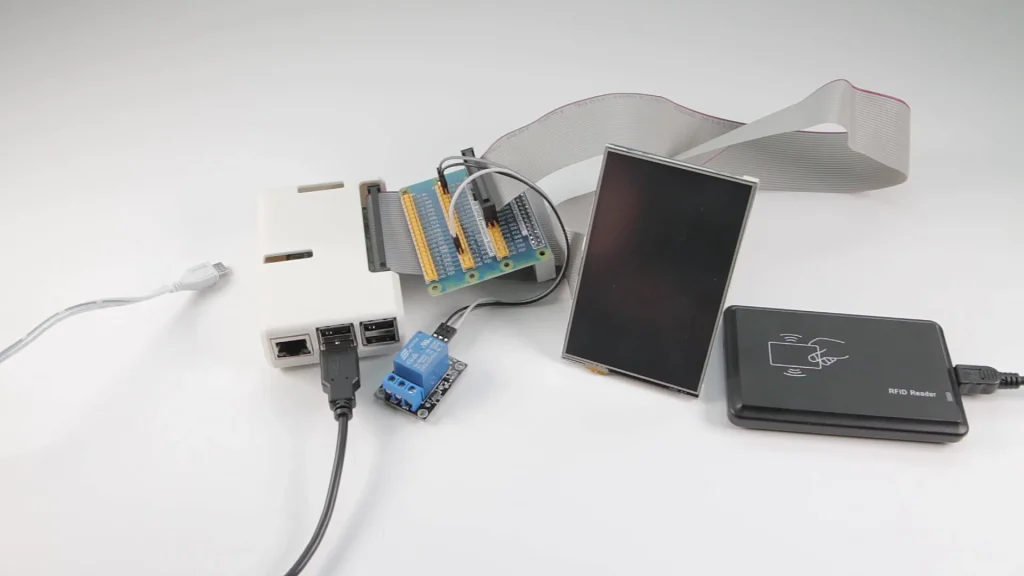
Discover how to build a secure and efficient Raspberry Pi door access control system with this step-by-step guide. From wiring components to programming in Python, this project highlights the versatility of a keypad door lock powered by Raspberry Pi for smart home automation. Whether you’re a beginner or an experienced maker, explore the possibilities of a Raspberry Pi lock and bring advanced security and convenience to your space!
To design a Raspberry lock project, you’ll need the following components and steps:
Components for Pi Keypad Door Lock
- Raspberry Pi (any model with GPIO pins, e.g., RPi 4) Buy
- Relay Module (to control the lock) Buy
- Electronic Lock (servo motor or solenoid lock) Buy
- Keypad (for entering PIN or password) Buy
- LCD Display (optional, to display status messages) Buy
- Buzzer (to give feedback on successful/unsuccessful entry) Buy
- Power Supply (appropriate for your Raspberry Pi and lock system) Buy
- Cables and Connectors
🛒 To buy other parts, see Siqma store.
Steps to Design Raspberry Pi Door Lock
-
Set Up Raspberry Pi
- Install the necessary OS (e.g., Raspberry Pi OS) on your Raspberry Pi.
- Enable SSH for remote access (if needed).
- Install Python and any required libraries (e.g.,
RPi.GPIOfor GPIO control,timefor delays).
-
Connect the Keypad door lock
- Use a 4×4 matrix keypad or similar to input a PIN code.
- Connect the keypad to the GPIO pins on the Raspberry Pi.
- Use a Python library like
GPIOorKeypadto interface with the keypad.
-
Connect the Relay and Lock
- Use a relay module to control the electronic lock (whether it’s a servo or solenoid).
- Connect the relay to the GPIO pins on the Raspberry Pi.
- Connect the relay to the lock mechanism, ensuring the lock is activated when the relay is triggered.
-
Set Up the Buzzer
- Connect a buzzer to a GPIO pin to provide auditory feedback on successful or incorrect PIN entries.
- Connect a buzzer to a GPIO pin to provide auditory feedback on successful or incorrect PIN entries.
-
Programming
- Write a Python script to:
- Read input from the keypad.
- Validate the entered PIN.
- Activate or deactivate the lock based on the correct PIN.
- Provide feedback via the buzzer (e.g., beep for correct, error beep for incorrect).
- Display status on the LCD (optional).
- Write a Python script to:
-
Testing and Debugging
- Test the system by entering the PIN and observing the lock’s behavior.
- Adjust the timing of the relay to ensure the lock engages/disengages properly.
Basic Python Code Example for Raspberry Pi lock project
Here’s a basic example to control the Raspberry pi lock based on a PIN:
import RPi.GPIO as GPIOimport timefrom keypad import Keypad# Define GPIO pins for relay, buzzer, etc.RELAY_PIN = 17BUZZER_PIN = 27keypad = Keypad() # Initialize keypad object# PIN CodeCORRECT_PIN = "1234"# Setup GPIOGPIO.setmode(GPIO.BCM)GPIO.setup(RELAY_PIN, GPIO.OUT)GPIO.setup(BUZZER_PIN, GPIO.OUT)# Function to activate lockdef activate_lock():GPIO.output(RELAY_PIN, GPIO.HIGH)time.sleep(2) # Keep the lock open for 2 secondsGPIO.output(RELAY_PIN, GPIO.LOW)# Function to provide feedback (buzzer)def give_feedback(success):if success:GPIO.output(BUZZER_PIN, GPIO.HIGH)time.sleep(0.5)GPIO.output(BUZZER_PIN, GPIO.LOW)else:GPIO.output(BUZZER_PIN, GPIO.HIGH)time.sleep(1)GPIO.output(BUZZER_PIN, GPIO.LOW)# Main loopwhile True:pin = keypad.get_pin() # Get the input PINif pin == CORRECT_PIN:print("PIN Correct! Lock Activated.")activate_lock()give_feedback(True)else:print("Incorrect PIN. Try Again.")give_feedback(False)time.sleep(1) |

Additional Features of Raspberry Pi door lock DIY (Optional)
- Wi-Fi Connectivity: Add a module for remote control via a smartphone or app.
- Mobile App Integration: Use Bluetooth or Wi-Fi to allow unlocking via an app.
- Facial Recognition: Integrate a camera for face recognition using OpenCV.
Raspberry Lock Project: What’s Next
By implementing a Raspberry Pi-based door access control and keypad door lock system, you can significantly improve security while keeping the project DIY-friendly and affordable. This will give you a basic Raspberry pi lock project that can be expanded with more advanced features over time and arrive to Raspberry Pi Smart Home Control Panel. Also, to learn more about applicable projects, you can see the Raspberry Pi Projects article. good luck
FAQ
-
How do I build a Raspberry Pi door lock system?
To build a Raspberry lock , you’ll need components like a Raspberry Pi, relay module, electronic lock, and keypad, along with Python programming to control them. -
What is the best Raspberry Pi lock project for beginners?
The easiest Raspberry lock project involves a simple keypad for PIN entry, a relay to control the lock, and a buzzer for feedback. -
What power supply does a Raspberry Pi lock system require?
A reliable 5V power source is essential to keep the Raspberry Pi running smoothly. However, most electronic door locks, such as solenoid or strike locks, often need a higher voltage like 12V. For best results, use separate power lines and make sure both supplies are stable to avoid sudden lock failures. -
Can I use an RFID reader with Raspberry Pi for access control?
Absolutely. Adding an RFID module to a Raspberry Pi is a popular way to build a secure access control system. By scanning RFID tags or key fobs, the Pi can verify authorized users and trigger the lock mechanism. It’s simple, efficient, and ideal for homes, offices, and maker projects. -
How do I safely connect a solenoid lock to Raspberry Pi GPIO pins?
You shouldn’t power a solenoid lock directly from the GPIO pins. These pins can’t handle the current required. Instead, use a transistor or MOSFET driver circuit, plus a flyback diode, to protect the board. This setup ensures your Pi stays safe while delivering enough power to operate the lock reliably. -
Is a Raspberry Pi secure enough for a smart keypad door lock?
Yes, as long as you follow good security practices. Keep the operating system updated, disable unused services, and limit remote access. Adding strong passwords and network firewalls will greatly reduce vulnerabilities, making the Raspberry Pi a dependable platform for smart locking solutions.


6 thoughts on “Step-by-step Guide to create Raspberry Pi lock project – A DIY Tutorial”
Pingback: New features of the Raspberry Pi 6
Pingback: Top New Arduino Projects and Raspberry Pi Ideas for 2025
Pingback: Arduino Heart Rate Monitor: Build Your Own Device
Pingback: Raspberry Pi Home Assistant: Build Your Smart Home Hub
Pingback: Introducing the Project – Jonathan's Blog
Pingback: Research – Jonathan's Blog