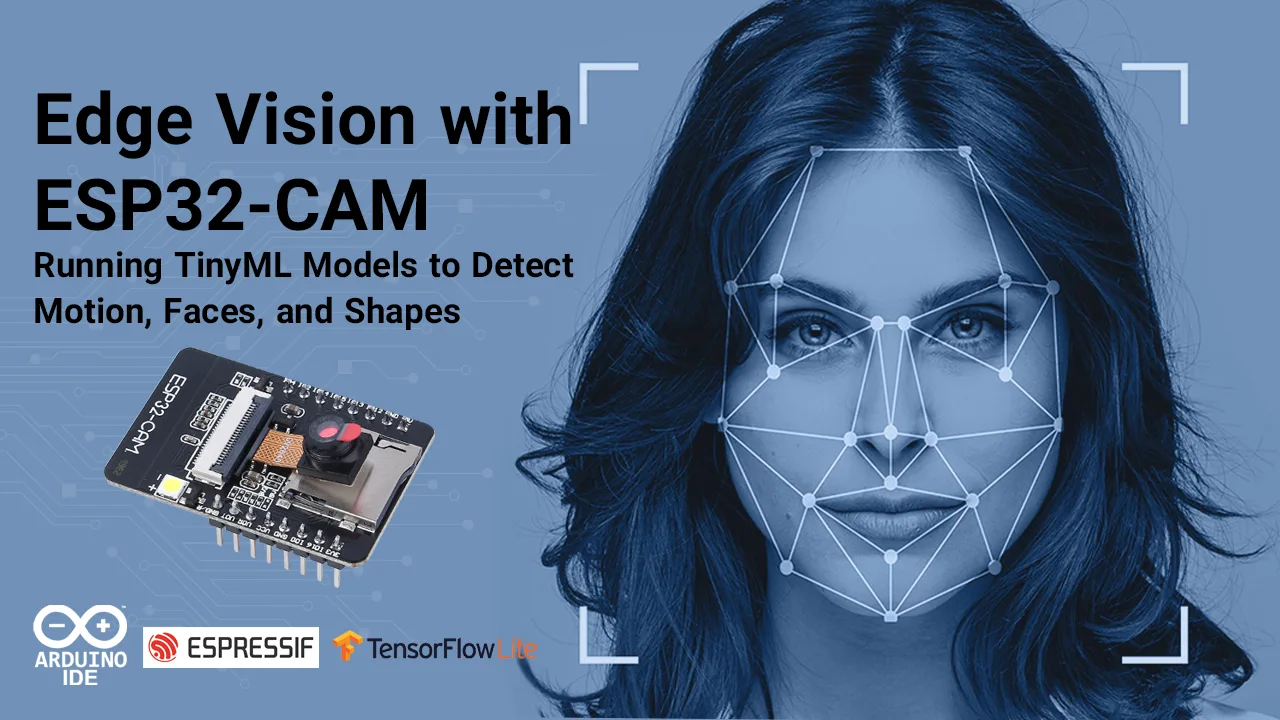
We live in a world where cameras are everywhere—from your phone to your doorbell—but most of them depend on cloud servers to analyze images. What if your camera could think locally, right on the device, without sending data to the internet? That’s the magic of edge vision.
In this tutorial, we’ll build an Edge Vision with ESP32-CAM microcontroller. You’ll learn how to run a tiny machine learning (TinyML) model directly on the ESP32-CAM to detect motion, faces, or even geometric shapes. The best part? No cloud required everything happens right at the edge.
Why ESP32-CAM for Edge Vision?
The ESP32-CAM is a low-cost microcontroller board based on the Espressif ESP32-S chip. It combines:
-
A built-in OV2640 2MP camera
-
Wi-Fi + Bluetooth connectivity
-
A microSD card slot for data logging
-
4 MB of PSRAM for buffering image data
-
Compact size (27 × 40 mm) and super low cost
Despite its small size, it can handle basic computer vision and ML tasks if optimized properly. Perfect for DIY security cameras, smart sensors, and Edge AI with ESP32-CAM on a budget.
ESP32-CAM motion detection Core Project Idea
We’ll train and deploy a lightweight ML model (using TensorFlow Lite for Microcontrollers) that runs on the ESP32-CAM to perform:
-
Motion detection → Identify when something in the frame is moving.
-
Face detection → Recognize the presence of a human face.
-
Shape detection → Detect simple geometric patterns like circles, squares, or triangles.
Instead of sending raw video to a server, the ESP32-CAM processes frames locally and only triggers actions (e.g., turn on an LED, log an event, or send a notification) when something relevant is detected.
🛒 ESP32-CAM Edge Vision: Hardware Requirements
-
ESP32-CAM module (AI-Thinker version recommended)
-
FTDI programmer (Since the ESP32-CAM lacks a built-in USB port, you’ll need an FTDI programmer to upload code via the U0R and U0T serial pins.)
-
MicroSD card (optional, for data logging)
-
5V power source (USB or LiPo battery + regulator)
-
Optional: PIR motion sensor (to trigger image capture)
The ESP32-CAM provides three GND pins and two power options: 3.3V or 5V. GPIO 1 (U0T) and GPIO 3 (U0R) serve as the serial pins needed for uploading code. GPIO 0 is also crucial—it controls flashing mode. When GPIO 0 is connected to GND, the ESP32 enters flashing mode for programming.
Software & Tools
-
Arduino IDE or PlatformIO for ESP32 development
-
ESP32 board definitions (install via Arduino Boards Manager)
-
TensorFlow Lite for Microcontrollers library
-
OpenCV / Edge Impulse / Teachable Machine (for training your model)
-
ESPixel or FastLED (optional, for LED feedback)
Here is one more thing you can explore with the ESP32 to expand your project’s possibilities.
Create a DIY Smart Chatbot Lamp with ESP32 ChatGPT Voice Assistant
Edge AI with ESP32-CAM Workflow Overview
This workflow shows how the ESP32-CAM can capture images, run a TinyML model, and make real-time decisions like detecting motion, faces, or shapes—all directly on the device.
-
Capture & preprocess images
-
ESP32-CAM captures low-res grayscale frames (e.g., 96×96 or 160×160 pixels).
-
Data is normalized for ML input.
-
-
Train a TinyML model
-
Use Edge Impulse, TensorFlow Lite, or Google Teachable Machine.
-
Models like MobileNetV2 or custom CNNs can be compressed/quantized for ESP32.
-
Output classes: motion/no-motion, face/no-face, circle/square/triangle.
-
-
Convert model to .tflite
-
Optimize with post-training quantization (int8) for ESP32.
-
Keep model size under 1 MB (due to RAM/flash limits).
-
-
Deploy to ESP32-CAM
-
Upload code + TFLite model.
-
Integrate inference loop with image capture.
-
-
Run inference locally
-
ESP32 processes camera frames in real-time.
-
Outputs classification results (detected object/motion/shape).
-
CameraWebServer Example Code
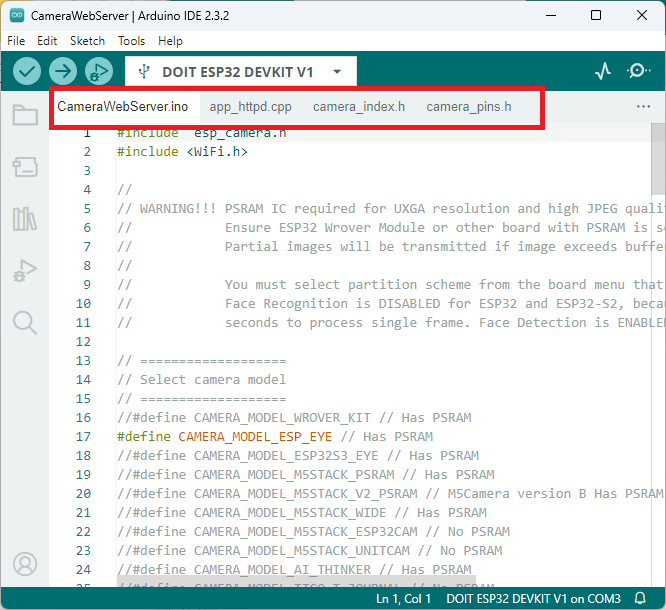
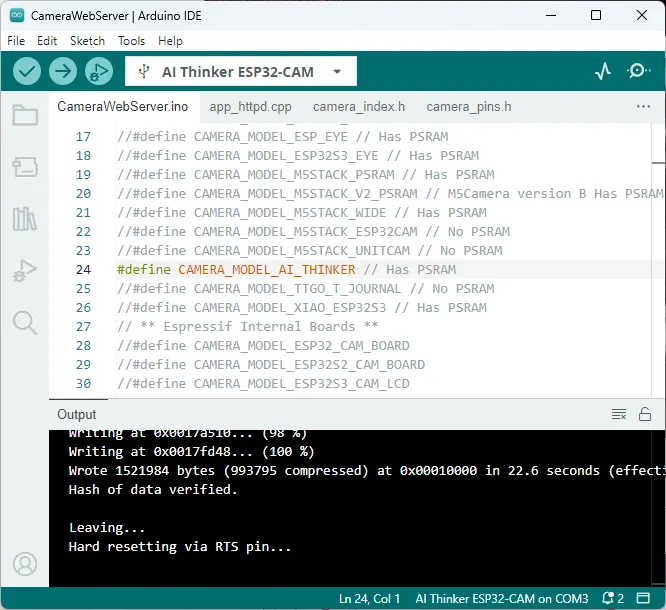
In your Arduino IDE, go to File > Examples > ESP32 > Camera and open the CameraWebServer example.
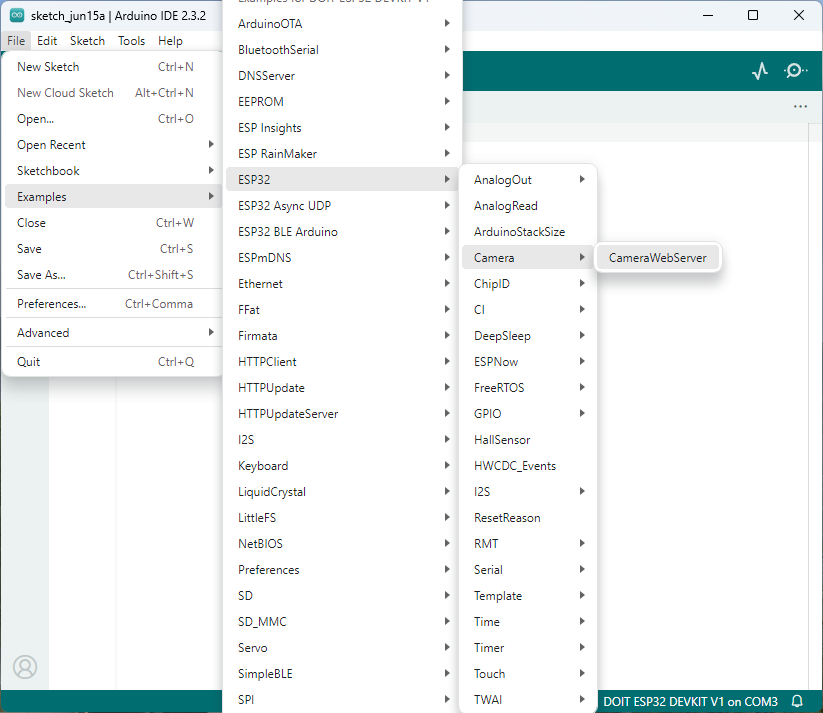
The code below should load.
Example Code Snippet (Simplified)
|
|
This is a simplified version—your actual code will include memory management, quantized tensors, and possibly DMA buffering for smooth frame capture.
Enter your Wi-Fi credentials in the variables below before uploading the code:
const char* ssid = "REPLACE_WITH_YOUR_SSID"; |
Hook up the ESP32-CAM to your PC using an FTDI programmer. Refer to the schematic diagram:

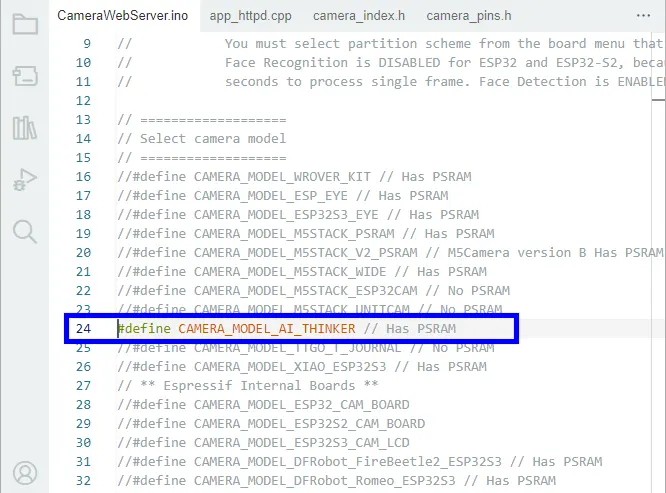
Note: Make sure you select the right camera module. In this case, we’re using the AI-THINKER Model.
Define CAMERA MODEL AI THINKER
// Select camera model |
Important: To upload code, make sure GPIO 0 is connected to GND.
| ESP32-CAM | FTDI Programmer |
| GND | GND |
| 5V | VCC (5V) |
| U0R | TX |
| U0T | RX |
| GPIO 0 | GND |
To upload the code, follow these steps:
-
In the Arduino IDE, go to Tools > Board and select AI-Thinker ESP32-CAM.
-
Go to Tools > Port and choose the COM port to which the ESP32 is connected.
-
Click the Upload button to transfer the code.
- When dots begin to appear in the debugging window, press the ESP32-CAM’s on-board RST button if it doesn’t automatically enter flashing mode.

After a few seconds, the code will be successfully uploaded to your board.
Obtaining the IP Address
After uploading the code, disconnect GPIO 0 from GND.
Next, open the Serial Monitor with the baud rate set to 115200 and press the ESP32-CAM’s on-board Reset button.
The Serial Monitor will then display the ESP32’s IP address.

Edge AI with ESP32-CAM Accessing the Video Streaming Server
You can now view the camera stream on your local network. Simply open a web browser, enter the ESP32-CAM’s IP address, and click the Start Streaming button to begin video playback.
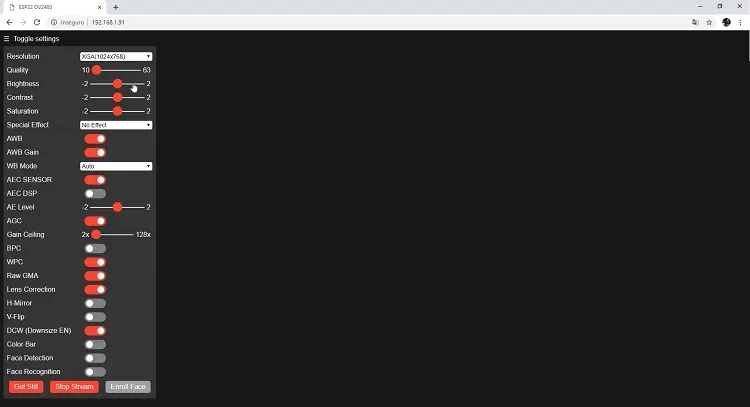
You can also capture photos by clicking the Get Still button. By default, these photos aren’t saved, but you can modify the code to store them on the onboard microSD card.
Additionally, several camera settings are available for adjusting image quality, and the ESP32-CAM also supports face detection and recognition.
And that’s it! Your video streaming web server is now running with face detection and recognition using the library example.
TinyML project with ESP32-CAM Real-World Use Cases
-
Smart doorbell → ESP32 detects a face and triggers a notification.
-
Desk companion → Recognizes hand gestures or shapes to control music/lights.
-
Motion-triggered logger → Logs only when activity is detected.
-
Privacy-first security cam → Processes video locally without uploading data to cloud.
ESP32-CAM motion detection Optional Advanced Features
-
Wi-Fi Streaming + Local Inference
-
Stream low-res video to a browser for debugging.
-
Still run ML inference on-device for event filtering.
-
-
MQTT/IoT Integration
-
Send detection results to Home Assistant, Node-RED, or a custom dashboard.
-
Example: Turn on lights when motion is detected.
-
-
Edge + Cloud Hybrid
-
Run lightweight detection locally.
-
Upload frames to the cloud only if a positive detection occurs (saves bandwidth).
-
-
Custom Shape Detection with OpenCV Lite
-
Preprocess images using edge detection (Canny/Sobel).
-
Classify contours to detect circles, squares, etc.
-
-
Low-Power Optimization
-
Use deep sleep mode when idle.
-
Wake on motion detection (PIR sensor or camera frame difference).
-
Extend battery life significantly.
-
Wrapping Up
The ESP32-CAM Edge Vision project shows how powerful tiny AI can be when it runs directly on a microcontroller. With the right optimizations, you can detect motion, faces, or shapes without ever sending video to the cloud. This keeps your project faster, more private, and more power-efficient.
Whether you want to build a smart security system, AI doorbell, or interactive art project, this tiny board proves that AI at the edge is no longer just a concept—it’s DIY-ready.
FAQ:
-
What limitations should I expect when running TinyML on the ESP32-CAM?
The ESP32-CAM has limited RAM (520 KB) and processing power, so only lightweight models can run efficiently. Complex deep learning tasks may require model optimization techniques like quantization and pruning.
-
Can the ESP32-CAM detect motion and faces in real time?
Yes, with properly trained TinyML models, the ESP32-CAM can process camera frames in real time to detect motion, identify faces, and even classify basic shapes, depending on model complexity and memory limits.
-
How can the ESP32-CAM run TinyML models for edge vision tasks?
The ESP32-CAM uses optimized TensorFlow Lite Micro models, allowing it to run lightweight ML tasks like motion detection, face recognition, and shape classification directly on-device without cloud dependency.
2 thoughts on “Edge Vision with ESP32-CAM: Running TinyML Models to Detect Motion, Faces, and Shapes”
Pingback: Battery Technologies for Extended Drone Flight Time
Pingback: Energy-aware ESP32 TinyML Benchmark Models for Intelligence